Agency Codes are better organized and less cumbersome now
We re-designed part of SinglePoint Settings so you can more easily manage your Agency Codes and set them as defaults for all the SinglePoint users in your agency. You can now set defaults directly on the Agency Codes screen.
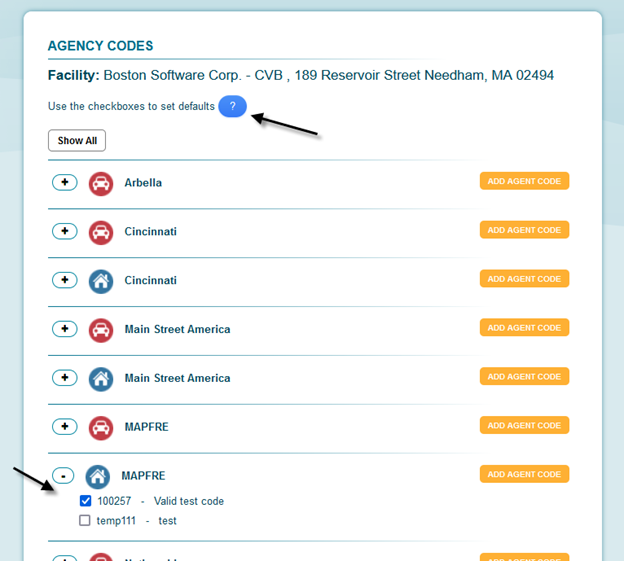
As you can see in the screen shot below, it is very easy to set Agency Codes as the default for specific carrier(s) in your agency:

Once you are on the screen to manage your Agency Codes in SinglePoint Settings — that is, the screen where you can enter and edit your Codes — then all you have to do is:
- Select the + button next to carrier name to view/enter your Agency Codes and/or Plan Codes.
- Check the box next to the Agency Code if you wish to set this as the Default for your agency.
- SinglePoint Managers should set defaults for the agency staff.
That’s it! Simple as apple pie.
In the past you first had to enter your Agency Codes, save them, and then navigate to the Auto Rating Defaults screen and select which codes to set as your defaults. But now the “Set as Default” feature is a simple check box located right on the Agency Code screen.
Quick reminder on where to locate the Agency Codes screen in SinglePoint Settings:
- Go to SinglePoint Settings in the top right corner of SinglePoint.
- Select the “Rating and Printing” tab.
- Select the “Agency Codes” option.
- You will arrive on the Agency Codes screen with the list of the carriers your agency writes with (as shown in the above screen shot).

