How to re-enable a SinglePoint user account that has been disabled

It is standard practice for software companies to automatically disable a user if the user does not log into the software platform on a regular basis. This is done for security purposes. Leaving users active (even when they are not) creates a pretty serious vulnerabilty to hackers. It is like leaving a window slightly ajar in your home. Boston Software automatically disables users if they do not log into SinglePoint in 120 days.

We trust that this extra layer of security outbalances any inconvenience it may be to re-enable a disabled user every now and then. And the good news is it’s pretty easy to re-enable one of your users.

Here’s how:

IMPORTANT: The SinglePoint Manager(s) in your agency is the only person(s) who can re-enable users.

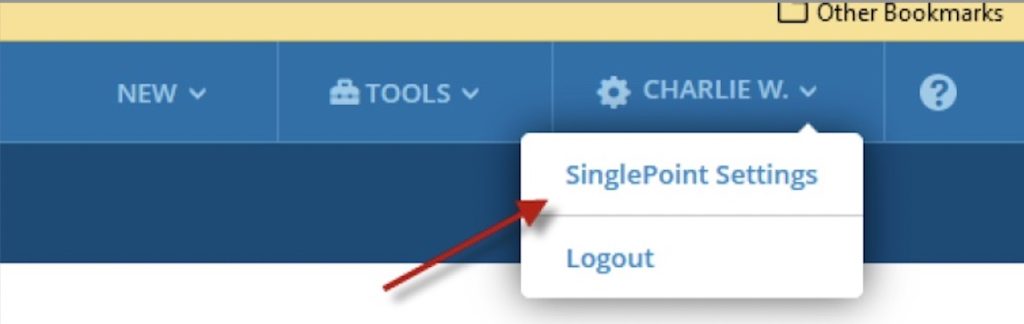
1.  The SinglePoint Manager should login to SinglePoint and click on your name in the top right corner to select SinglePoint Settings

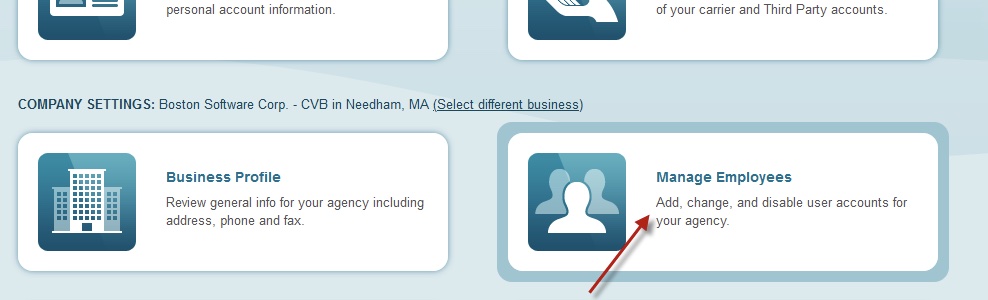
2. Then Select “Manage Employees”

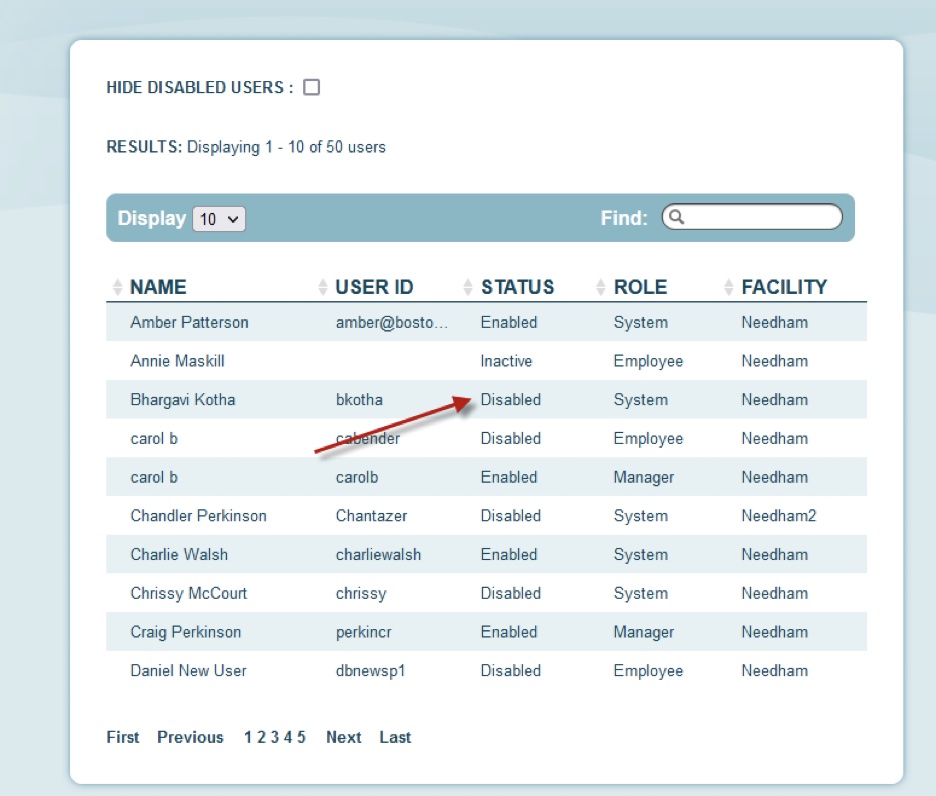
3. The list of all users in your agency will display. Notice that their status is shown as “Enabled” or “Disabled”. Find the user you wish to re-enable.

4. Click on the name of the user account you wish to re-enable.

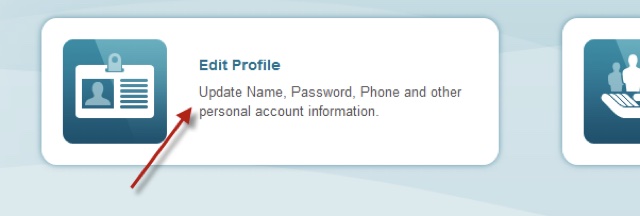
5. Click on “Edit Profile”

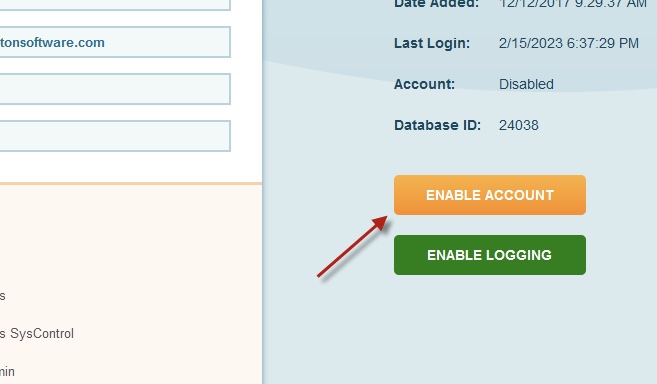
6. Click on “Enable Account” on the right side of the screen.

7. You will be prompted to confirm you wish to enable this account. Click “Enable Account”.

8. The user in your agency will receive an email informing the user to log into SinglePoint and reset his/her password. The user has 10 minutes to reset the password, otherwise the SinglePoint Manager will have to send another password reset email.